How to Scan from MultiFunction Printers
All EUI MultiFunction Printers allow for several different scan destinations/options:
The recommended scan destinations are OneDrive or Shared Folder.
Scan to email addresses should be used only for small documents as it is limited by the maximum allowed size of email attachments (10Mb, easily reached if you scan in colour and with high resolution).
For each scan type you can choose from among several file format destinations, including Word, Excel, PowerPoint as well as several image formats (i.e. JPG, PNG or TIF): the default file type is searchable PDF.
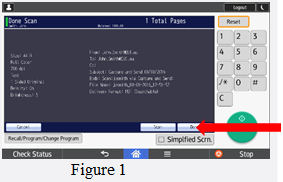
If your original document is a book or a stapled or bound booklet, you have to place it on the exposure glass and then tap the green Start button to scan. You have 60 seconds to turn the page and place the book again on the glass and tap the green button. When you have finished the work, tap Done on the touchscreen to close the file and to send the document to the recipient as illustrated in figure 1.
If your original document consists of one or more unstapled or unbound sheets, place the document face up on the automatic sheet feeder and tap the green Start or the Scan button to send the document to the recipient as illustrated in figure 1. Once you have finished, tap Done to close the file.
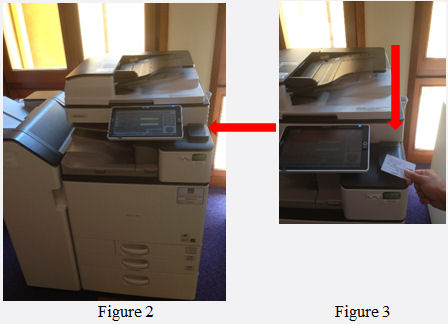
- Step 1. Wave your EUI badge over the card reader installed on the right-hand side of the machine as illustrated in figures 2 and 3. Or, if you have forgotten your card, you can insert your “User ID” and “Password” manually.
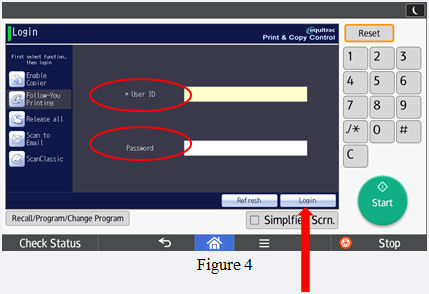
- Step 2. If you are logging in with the EUI badge, automatically you will be logged in when you wave your card; if instead you manually insert “User ID” and “Password”, tap Login as illustrated in figure 4.
- Step 3. After login you will start in the Follow-You (joblist) page as illustrated in figure 5.

- Step 4. Tap Launcher on the touchscreen as illustrated in figure 5.
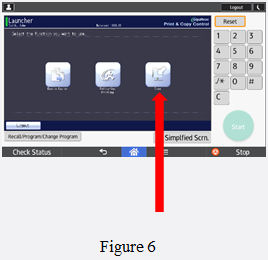
- Step 5. Tap Scan on the screen of the MFP as illustrated in figure 6.
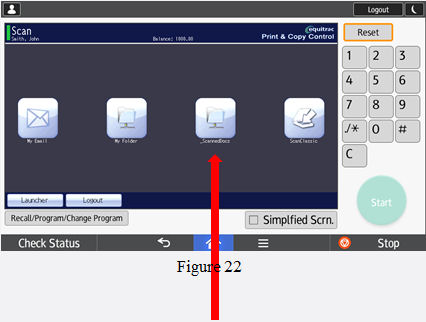
- Step 6. The following screen appears with all the scan destinations
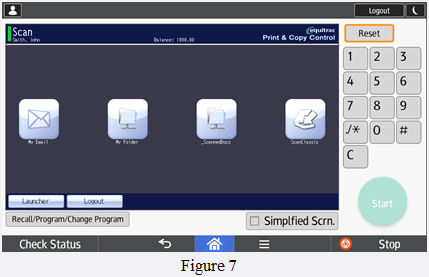
Step 7
Choose the scan destination:
- My Email (scan to your or other email address)
- My OneDrive
- Other destinations \ Shared Folder
Tap My Email to enter the scan to email function:
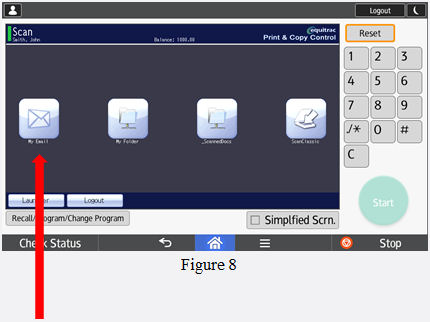
The MFP automatically fills in your own email as destination address. You can change the address manually by tapping on the To field.
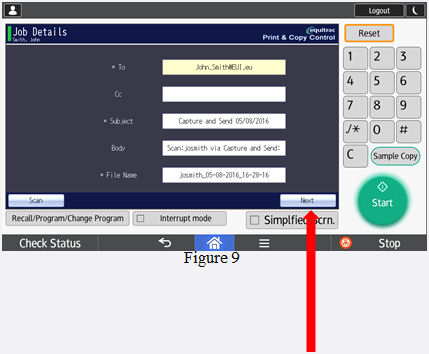
Tap Next to go to the file format selection or Scan if you want to go back to the previous menu:
Tap Delivery Format to open the scan format menu:
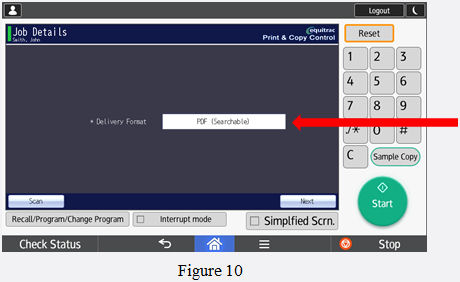
Tap on the desired file format and press OK:
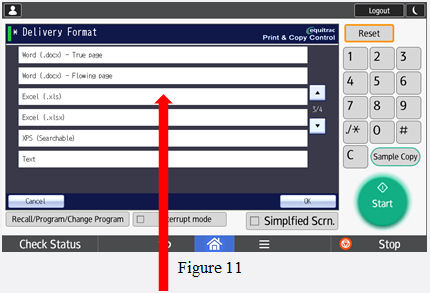
Please Note:
If you choose an editable format such as Word or Excel, the MFP will automatically perform Optical Character Recognition (OCR) and the resulting file will be immediately editable.
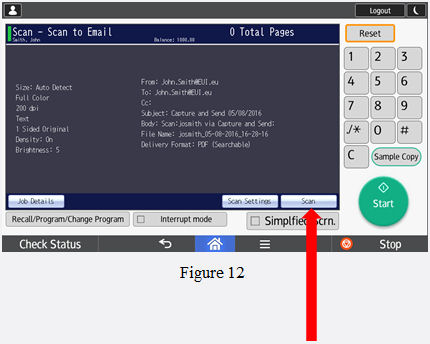
The machine provides you with a summary of your job: tap Scan or Start to start scanning:
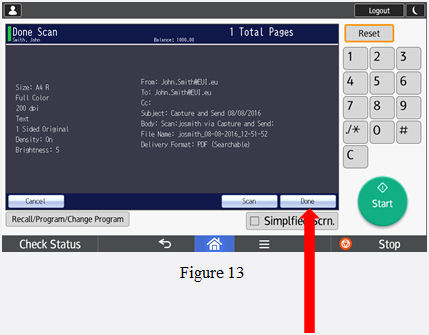
Once you have finished with the scanning, tap Done to close and send the file:
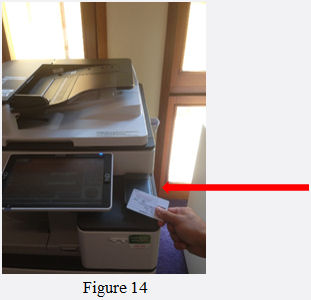
Step 8. Once you have finished scanning wave your EUI card over the card reader and you will be logged out automatically (figure 14).
Alternatively you can tap the
Home button, followed by
Menu and finally
Logout (figure 15). If you don’t logout, the next user could use your
print quota and your
credentials!

- If you are a Researcher, tap _ScannedDocs to enter the scan to shared folder function.
Any other user may tap Scan to XXX Share (where XXX = unit's code, e.g. RSC for the Robert Schuman Centre) to enter the scan to unit's shared folder function.
 Automatically the machine provides your (unit's) shared folder. Tap Next to go to the scan screen, or Delivery Format if you need to change file format.
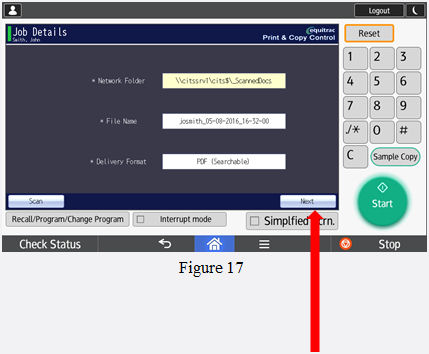 If you tap in Delivery Format it will open the scan format menu.
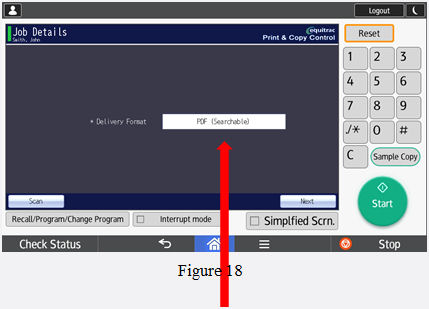 Select the needed format and tap OK.
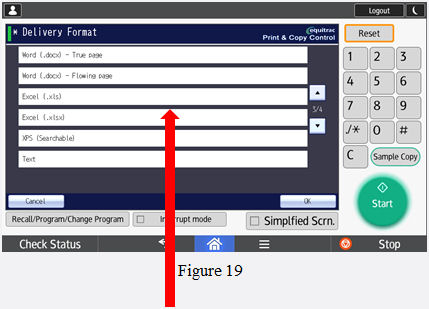 The machine provides you with a summary of your job: tap the Scan button or Start to start the scan job.
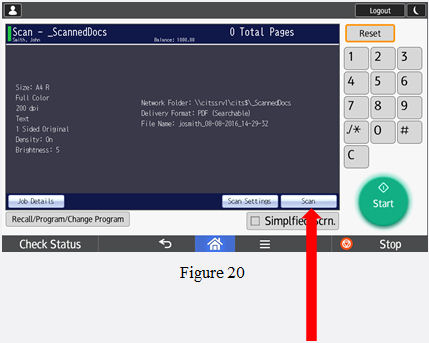 Once you have finished your scan job tap Done to close and send the file, then click Scan if you wish to scan other documents, or else Logout.
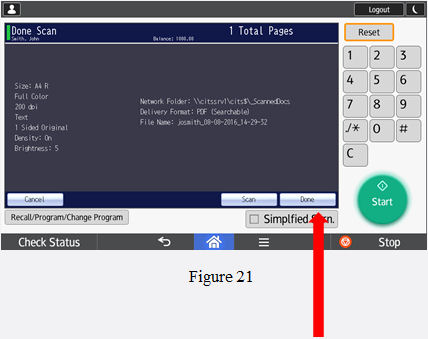
- Step 8. Once you have finished scanning, wave your EUI card near the card reader and you will be logged out automatically (figure 14).Alternatively you can tap the Home button, then Menu, and finally Logout (figure 15). Remember to logout, otherwise the next user could use your print quota and your credentials.
Page last updated on 27 August 2025