Virtual Private Network (VPN) allows you to make a secure remote connection to EUI's private network (intranet) by authenticating yourself as an EUI user.
Once you have connected to EUI's network via VPN, you will be able, amongst others, to remotely connect to your office computer or access your Personal (G:), Web (W:) and other Shared Areas [1] like if you were connected on campus.
The EUI has adopted the Cisco AnyConnect (Secure Mobility) Client as means of its VPN connection:
Please note that the Cisco AnyConnect Client software is ONLY for use on personally-owned computers/devices: your laptop, home PC, tablet or any computer/device which you have exclusive access to. It must NOT be installed on a public computer/device, at another university/institution or any other organisation (e.g. Internet Café).
Depending on your Operating System, there are different installation files and configuration methods: please select as appropriate (note that you may be prompted for a valid EUI account, Apple ID or Google account in order to download the client):
If you already have the Cisco AnyConnect Client installed, in order to access the EUI intranet just start the client and/or Add a new VPN Connection) and point it to:
-
Make sure you are connected to the Internet;
-
Start the Cisco AnyConnect Client and, if not already done so, type:
asa-bf.iue.it
in the Connection field:
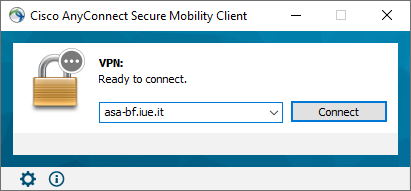
Figure 1: Cisco AnyConnect Client main connection window
-
-
In the Group field, make sure to choose EUI-VPN-MFA from the dropdown:

Figure 2: Select Group
-
Sign in using your EUI email address ((e.g. John.Smith@eui.eu) and authenticate against
MFA as you normally would:

Figure 3: EUI Sign in
- To reduce the number of times you are asked to sign in, we suggest to check the Don't show this again before clicking Yes at the following screen:

Figure 4: Stay signed in screen
-
Once successfully connected to EUI's private network, click Accept at the welcome message to agree to the Terms & Conditions:
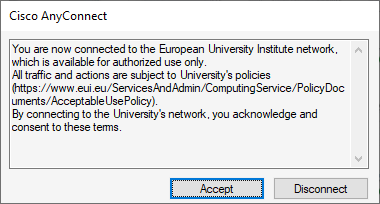
Figure 5: Welcome message.
You are now connected to EUI's intranet and can remotely connect to your office computer or access areas such as your Personal Network Area (G: Drive) as you normally would while on campus.
Please note that access performance depends on the speed of the internet connection used!
= Please note that this is NOT automatic: if not already done so, you will also need to configure the connections to your personal areas prior to be able to access them!
= 64bit version(s) of said Operating System(s) only!
Page last updated on 18 June 2025